

Vivariums: Terrariums, Aquariums, and Paludariums
What is a Vivarium?
A vivarium is any type of enclosure, container, or structure that is set up and manipulated to mock a specific biome and often a specific ecosystem for the purpose of observation or for pleasure. The term vivarium covers a wide range of different types, including but not limited to aquariums, terrariums, and paludariums.

Aquariums are vivariums that contain an aquatic (water) biome. This includes both fresh and salt water. It is the most popular of vivarium types among hobbyists.
Terrariums are vivariums that contain a terrestrial (land) biome. These are the second most popular enclosures, and are often the easiest to maintain.
Paludariums are vivariums that contain both terrestrial and aquatic elements. They are some of the more difficult vivariums to keep and maintain, but when done successfully can become largely self-sustaining, and carry the benefit of offering a variety of entertaining aspects from both land and water for enjoyment.
There are other sub types of vivariums such as ripariums (mocking marshes, shoreline, or wetlands and consisting of mostly water with plants that emerge from the water) and formicariums (ant farm terrariums). In addition, each type of terrarium can be made to mock a different biome, and ecosystem within that biome.
Elements of a Vivarium
Enclosure / Container / Structure
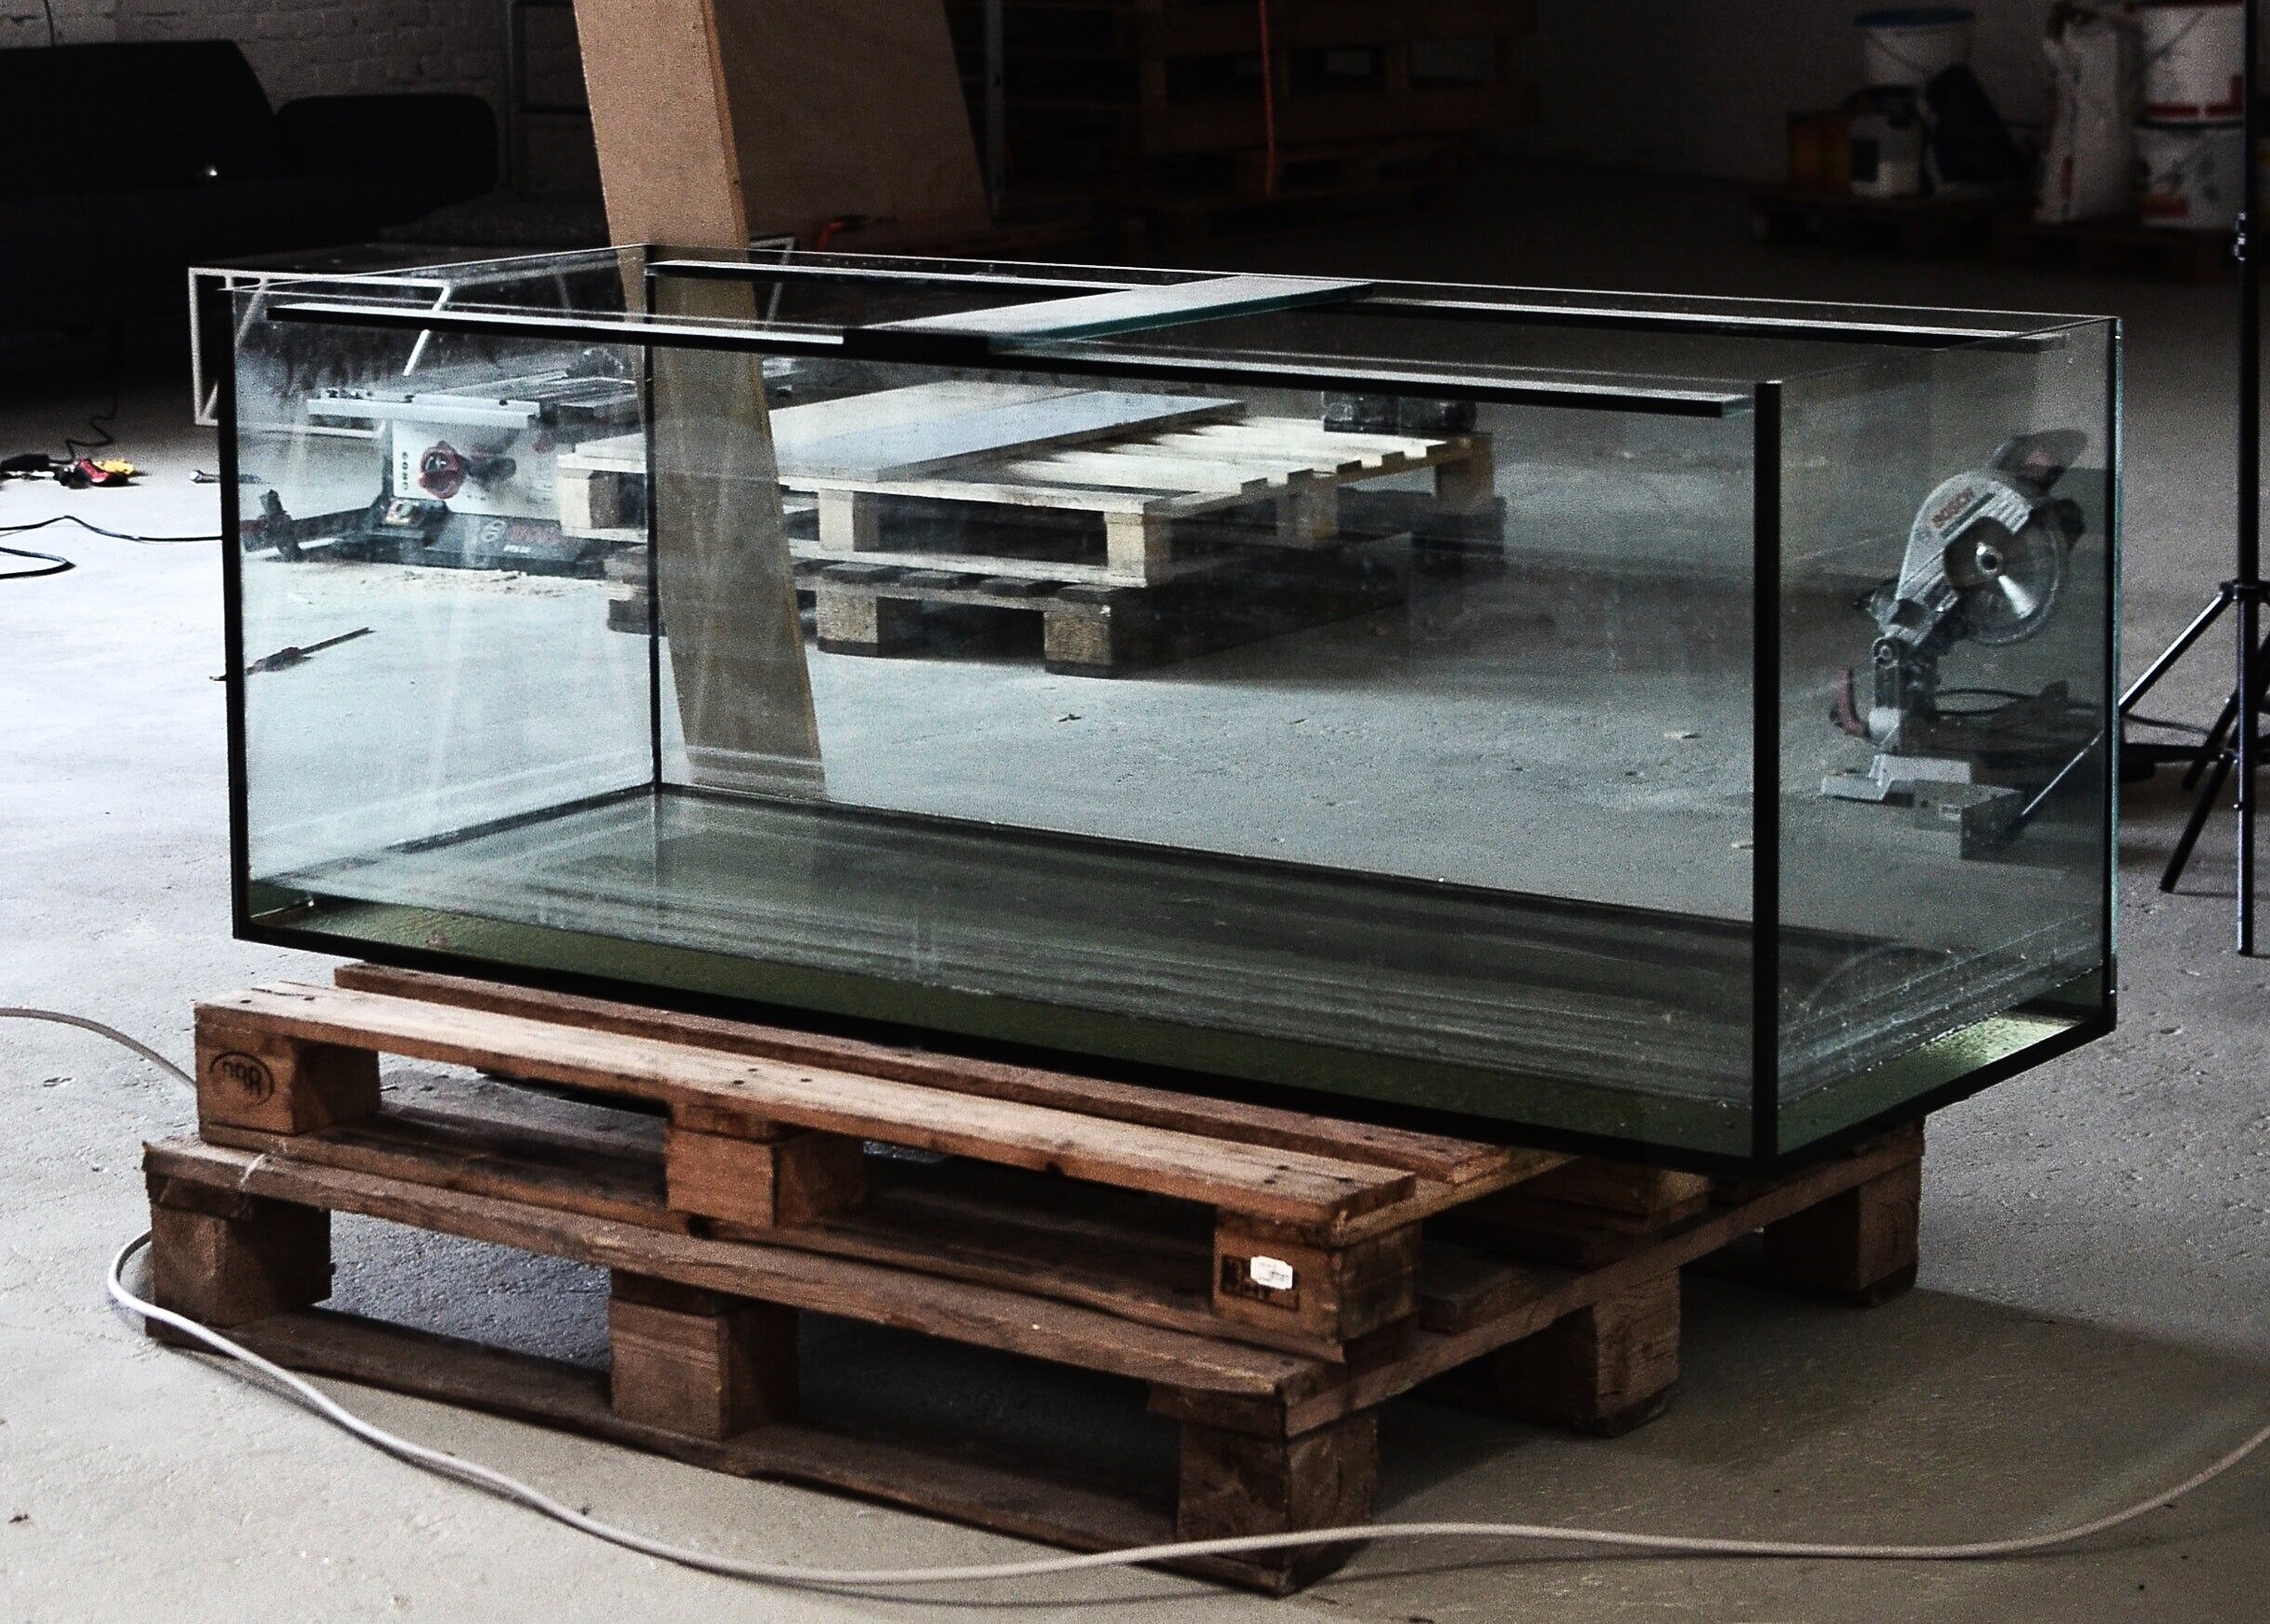
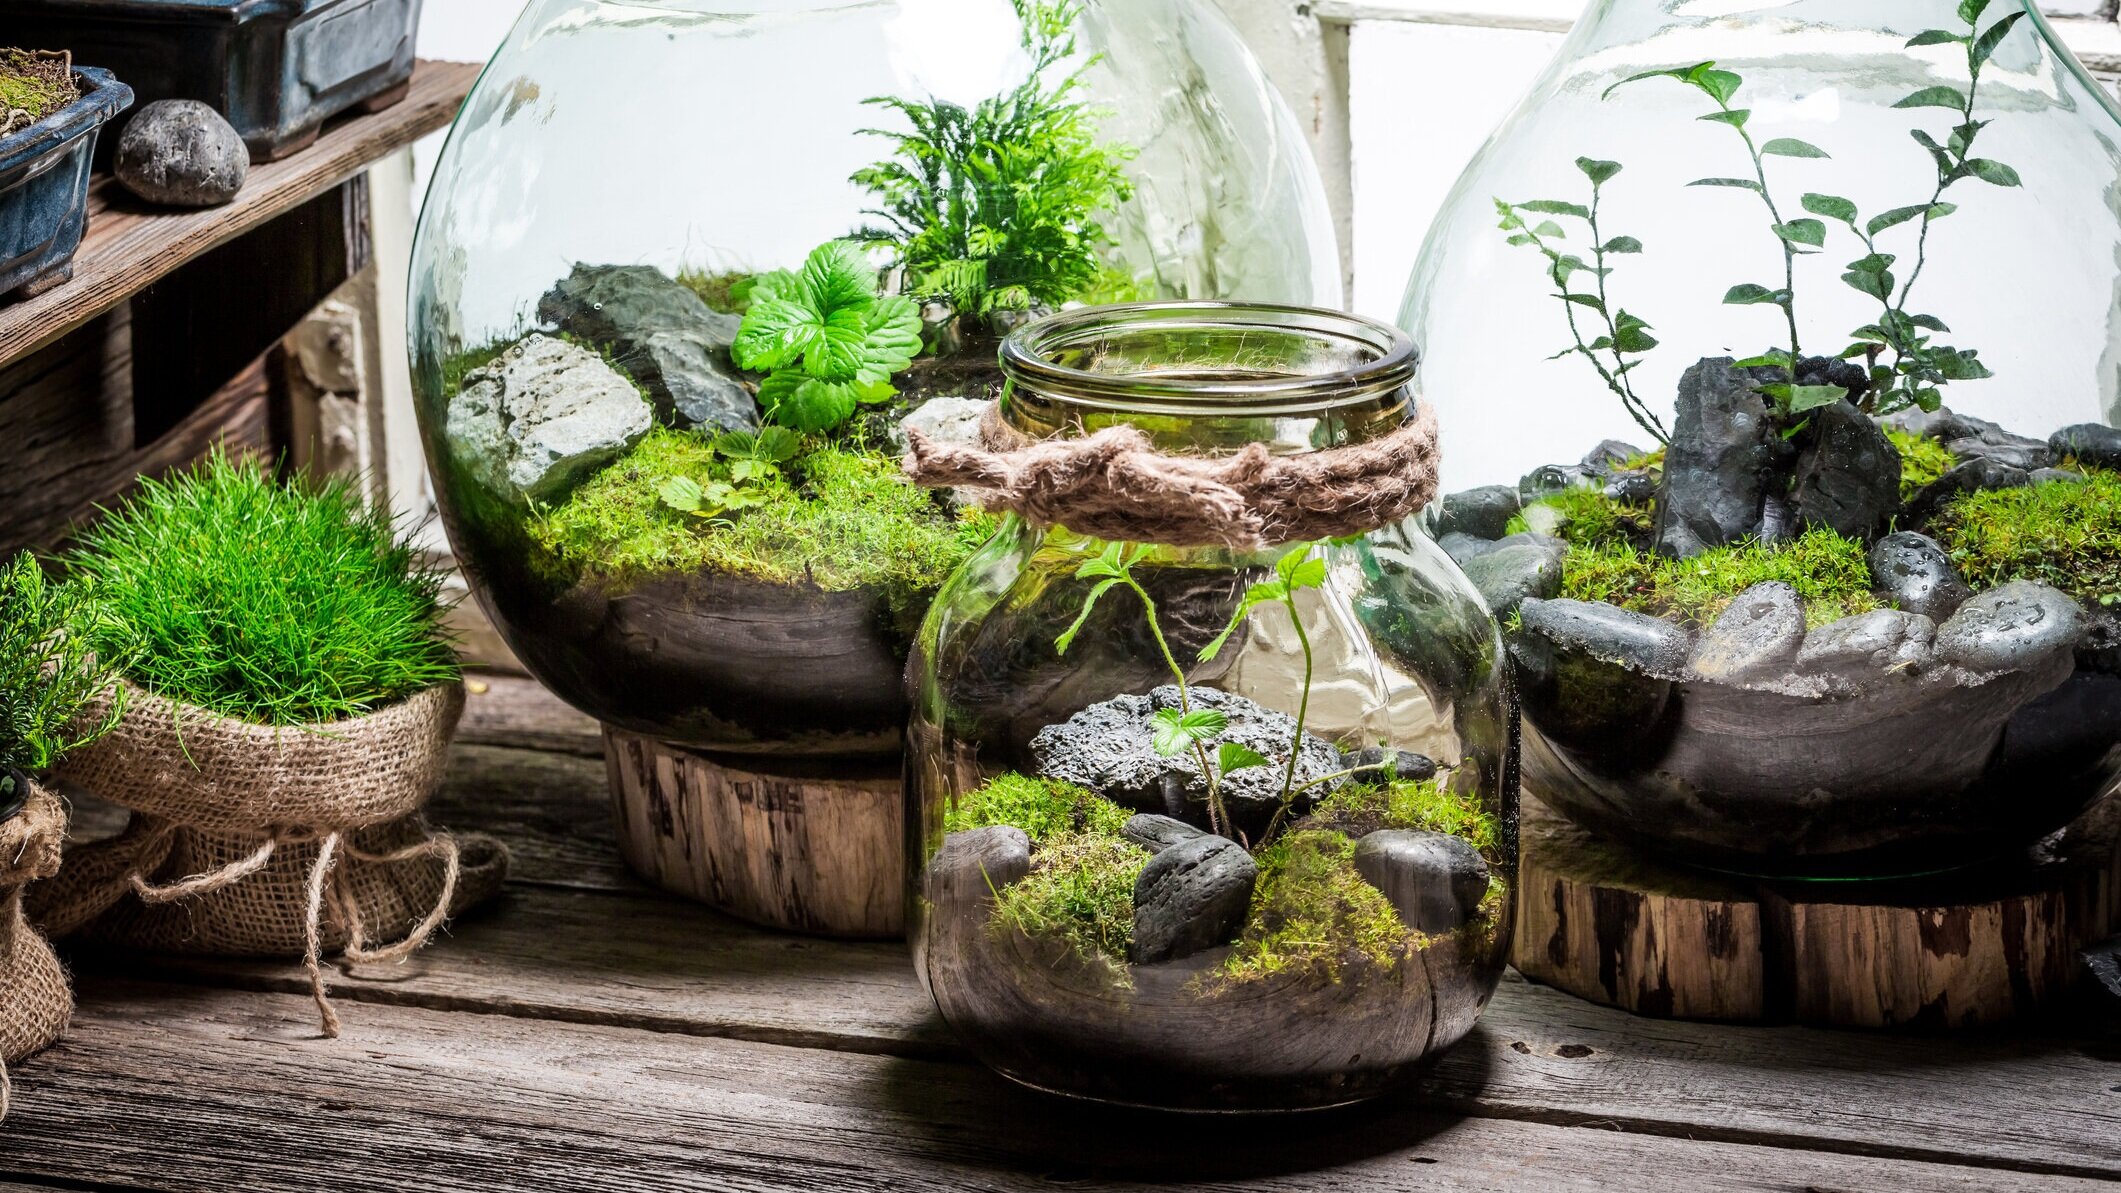
Enclosures, containers, or structures are the starting point of a vivarium. It encompasses, contains, and hosts your vivarium’s ecosystem. Vivariums can come in all shapes and sizes. They can be made in jars or small containers with just a few plants and insects. They can be made in larger enclosures or fish tanks. They can be custom made out of glass or acrylic panels, metal, wood, and some sealant. They can be built into walls, placed on top of tables, or even hung from ceilings. They can be as simple as a chunk of wood acting as a structure and a host for plants and microbes, or as complex and big as an olympic-pool-sized with sharks and rays.
Prefabricated enclosures are the easiest to start with, and they themselves come in a wide range of sizes, with a wide range of features. Some have glass doors that swing open toward the front, best for terrariums or paludariums. Some have 4 walls, a bottom and a lid, all sealed water-tight, best for aquariums. There are even enclosures on the market that come with built in, automated systems like lighting, airflow, heating, sensors, filters, pumps, and even a camera, all connected to applications that can be installed on smartphones or tablets.
Hardscape

The hardscape of a Vivarium is made up of non living, large materials that often form the base structure of the interior design. Hardscapes usually consist of materials such as logs, branches, rocks, and shells, and are sometimes held together and in place by some sort of non-toxic adhesive material such as silicone, or waterfall foam. Hardscape elements are also often created using waterfall foam or similar materials due to their light weight and flexibility.
Soil / Substrate
The Substrate is the “ground” inside of a vivarium, and is often made up of multiple layers. In planted aquatic setups, a single type of substrate such as gravel or sand may be utilized, but in terrariums, it is detrimental that there be multiple layers for success due to drainage purposes.
For example, in a tropical terrarium, its common to use layers of substrate from top to bottom as follows;


~Top~
Planting medium: ABG mix (Atlanta Botanical Gardens)
Activated charcoal
Barrier layer (mesh or screen)
Drainage layer (gravel, bio balls, etc)
~Bottom~
Planting medium in terrestrial set ups should contain mixes that do not compress. Potting soil or plain old dirt should never be used, since these substrates will compress and become waterlogged, swampy, and anaerobic. A drainage layer and a barrier layer (that keeps your planting medium from mixing with your drainage layer over time) are necessary for creating a water table in which excess water can reside without coming into contact with any planting medium. Any contact between the planting medium and water table can cause issues because of the planting medium's absorbent qualities. The result would be inhospitable conditions for plants. If a vivarium will have a water-soaked or covered area, it is best to use an aquatic substrate or gravel for these locations.
Cleanup Crews: Microfauna / Macrofauna / Fungi / Bacteria

Microfauna, macrofauna, bacteria, and fungi are the cleanup crew organisms in vivariums. They complete the cycle of nutrients by breaking down waste products and returning their nutrients to the substrate. They are essential for creating a bioactive self sustaining ecosystem in a vivarium. These cleanup crews are introduced to vivariums as cultures. They are added through cultures in soil, coral, rocks, filter medium, or other organic of nonorganic material from a previous setup. In aquariums it is common to introduce filter medium from a healthy, cycled tank into a new tank in order to culture it with beneficial microorganisms. In terrariums it’s common to add cultures of isopods and springtails to enclosures to act as a clean up crews for waste material such as decaying plants. Although they often go unseen, they are imperative to a bioactive system.
Flora

Flora means plants. This includes both aquatic and terrestrial plants. Plants in a vivarium can help clean and oxygenate water and air, clean soil/substrate from fauna waste, cycle nutrients, and regulate humidity. In aquatic vivariums, plants will remove nitrates from the water that can otherwise build up and become harmful to fauna in high levels.
Flora provides hiding places and sometimes even food for some inhabitants. They exist in a wide variety in each ecosystem, and are one of the more interesting and decorative elements of a vivarium. It is best to include a wide variety of plants for their color, visual pleasure, and growing characteristics. Some grow tall, some climb high, some spill over edges, and others spread along substrate.
Fauna

Fauna means animals. This includes all animals, for example amphibians, reptiles, insects, etc. In the vivarium world, it is common to distinguish microfauna and macrofauna separately from fauna. In vivarium ecosystems, fauna feed on other fauna or flora and create waste that is then processed by the bioactive ecosystem of bacteria, fungus, insects, and plants to be used as nutrients. Each type uses and returns nutrients to the ecosystem.
Fauna are usually the most appealing parts of a vivarium as they can be observed as they interact with their ecosystem. They consist of a wide range of species, and multiple species can often be kept together. They can be cool, creepy, colorful, and pretty. They can swim, crawl, slither, and climb. Choosing fauna can be one of the more exciting parts of the process of creating a vivarium, and they themselves are often one of the most entertaining aspects of a finished vivarium.
Optionals / Extras
There are many other optional / extra elements that may or may not be included in a vivarium build. Fans or air exchange vents can be added for airflow to avoid stagnant air. Misting systems can be installed with sensors and timers to automate the humidity control process. Water features such as waterfalls can be added, which require pumps to create. Access pipes or overflow valves for draining a terrarium’s water table can also be added. Thermometers, heaters, water filters, water circulators, lighting, aerators, etc can be added to a vivarium, and in some cases may be necessary for inhabitants.
Automation is one of the more appealing but pricier aspects of vivariums. Lighting, heating, misting units, and even vents can be automated to turn on and off, or open and close. Sensors are used to monitor things such as temperature and humidity, and trigger the automatic opening of vents, or activation of heaters and misters. In many cases this can all be controlled and monitored by applications on smartphones, tablets, or computers. As mentioned before, some enclosures come with these features prebuilt into them, but this can sometimes cause them to be less customizable.
How do you make a vivarium?
Step 1: Plan and Purchase
This is without a doubt the most important part of the process. Always do the appropriate research and create a plan for your vivarium. First, determine what type of habitat and biome will be used to model the enclosure after. What type of ecosystem will the vivarium emulate?
A biome is defined by its flora, fauna, soil, and climate. The 5 types are aquatic, grassland, forest, desert, and tundra. They can be broken down further into more specific biomes, for example fresh water, saltwater, lake, river, tropical rainforest, boreal forests, coastal deserts, semi-arid deserts, etc.


Once a biome is chosen, the elements of a specific ecosystem within the biome must be selected. An ecosystem consists of the living and non living things, and is defined by their relationship to each other. For example, a tropical terrarium may be selected along with dart frogs, and because of this the vivarium may include bromeliads, an ABG substrate mix, and a culture of isopods and springtails. Dart frogs like bromeliads and will sometimes lay eggs in them, and although their diets consist mainly of fruit flies, they can be supplemented with springtails. Dart frogs will then defecate and old plant material will die and break down. The springtails and isopods will help clean up this flora and fauna waste and return its nutrients to the soil, which will then be used by the plants again as fertilizer.

Tropical, Humid Ecosystem
The flora that will be included in the vivarium should be chosen during the planning process. These decisions can always be tweaked and changed a little, but the different selections may alter other decisions such as lighting, substrate, and temperature, and sometimes the plants must be selected based on the requirements of fauna. Select a variety of plants that are appealing to the eye and beneficial to the vivarium, and will provide a range of features. Upright plants are appealing to the eye, but to create a better variety utilize others such ground cover, spreading plants, and vining plants, and in aquariums, surface covering plants. Having a wide variety of flora will give your tank the opportunity to grow and change on its own over time; one of the most interesting perks of having a vivarium.
Deciding which fauna to include is often one of the most exciting to the hobbyist. During this process, be sure to do every bit of necessary research into your choices. The idea is to create the best possible habitat for the vivarium inhabitants, and changes to plant selection, lighting, airflow, waterflow, humidity levels, temperature, or even tank placement in your home may be required.
Once a specific biome and ecosystem have been selected, determine what needs to be included in the setup in order to mock the desired biome climate. As previously mentioned, some initial decisions may need to be changed to meet the requirements of the desired inhabitants. Do some research into the climate, humidity levels, light requirements, etc of the natural biome. Choose lighting and heating if necessary, misting/humidity control if necessary (misting can be done manually as well), and determine whether some form of air circulation or water circulation will be necessary. Air can be circulated by fans or passively by vents, and water may be circulated by filter returns, pumps, water features, or specialized devises made to create currents.


Next, choose the hardscape material. Hardscape consists of all the large non living and often structural elements such as rocks, wood, faux vines, waterfalls, etc. Choose some pieces that are interesting to the eye, appeal to your interests, and look natural to your environment. When choosing wood, be sure to research the different types of wood available, and their possible uses or qualities. This is extremely important in aquariums and paludariums, as some wood can leach into the water and dye it yellow or brown, or even add toxins to the water that can become harmful to a vivarium's inhabitants. Some woods can be prepared prior to adding them to water to alleviate leeching, so always do your research beforehand.
Next, decide what substrate layers or soil mixture will be used. In most setups, layers of several types of substrate are necessary or recommended. In terrariums specifically, several different layers are required in order to make a successful, bio active substrate. For example, an appropriate layering plan in a tropical rainforest terrarium would be a drainage layer consisting of something nonabsorbent (such as gravel, bio balls, etc), a barrier (such as plastic screen), a layer of activated charcoal (optional), and then a planting mix such as an ABG mix (Atlanta Botanical Gardens mix, which consists of tree bark, charcoal, tree fern, and sphagnum moss). The drainage layer creates a buffer between excess water and the planting medium so that the mix doesn’t become flooded or swampy if there is excess water.
Non-living elements can be purchased once plans are complete and decisions have been made. There’s plenty of websites online that are knowledgeable and sell high quality supplies. Don’t forget to visit local pet stores and aquarium/terrarium stores and nurseries. Material from nature can also be used, but always be careful with doing so as unwanted hitch-hikers, pests, or chemicals can be accidentally introduced to your enclosure.

When all non living material has been purchased, it is time to make a sketch, or mock-up of the vivarium. Start by laying out all of the elements that may need to be hidden within the vivarium. Roughly arrange the unnatural elements such as lights, filters, pumps, plumbing, etc. Once this is complete, decide how to layout the hardscape in a way that will fit in the enclosure and conceal these unnatural elements, and is interesting and creates features that plants and animals will enjoy. Take pictures of the rough set up, or draw a mock-up if preferred. Disassemble until ready to build.
Step 2: Create the Hardscape

A finished aquarium with an eye-appealing hardscape.
Set up pipes, wires, filters, heaters, pumps, etc in areas where they can be hidden. Some of them may need to be put into place before building your hardscape over them, but some may be able to be put in afterwards. Use your hardscape materials to create a base structure for your vivarium. Using waterfall foam, silicone, or some other form of vivarium safe adhesive and bonding agent, secure your hardscape features in place. Use the hardscape features to hide the unnatural aspects, such as plumbing and wires. Create a layout that is appealing to the eye. Keep in mind you may want to be able to access the equipment you’re hiding in case things break or fail. You’ll also want to create pockets for plants to be planted if you’re creating a terrarium or paludariums.
Waterfall foam is a great way to create lightweight, stone-looking features that holes can be cut into to create pockets for plants. While creating your hardscape, don’t forget to consider which sides your enclosure will be viewed from. Will you only observe from one side, or three, or maybe all sides? Making sure the hardscape is interesting from each viewing angle is key.
If you have used waterfall foam to cement your hardscape or to create hardscape elements, you can use silicone, and substrate to disguise it and make it look more natural. You can use substrates such as sand, gravel, or coconut coir for this process. First, smear or paint clear 100% silicone onto the areas that need to be disguised. Next, take handfuls of substrate and toss it all over the silicone to coat it liberally. Lightly press the substrate into the silicone if necessary. Let it dry completely, then dump the extra substrate out and vacuum up any remaining loose substrate with a shop vacuum. Let all hardscapes dry for 24-48 hours, or as long as your binding agents require.
Step 3: Add and Prep the Substrate
When adding the substrate or layers of substrate, it’s important to use proper amounts. Before adding any substrate to aquariums, be sure to thoroughly rinse the material until the water runs clear. Failure to do so may cause overly cloudy water. Some cloudiness is normal, but the clarification process will be greatly reduced by rinsing substrate properly. In an aquarium, a single substrate may be used, but it is still important to use an adequate amount for the roots of live plants.
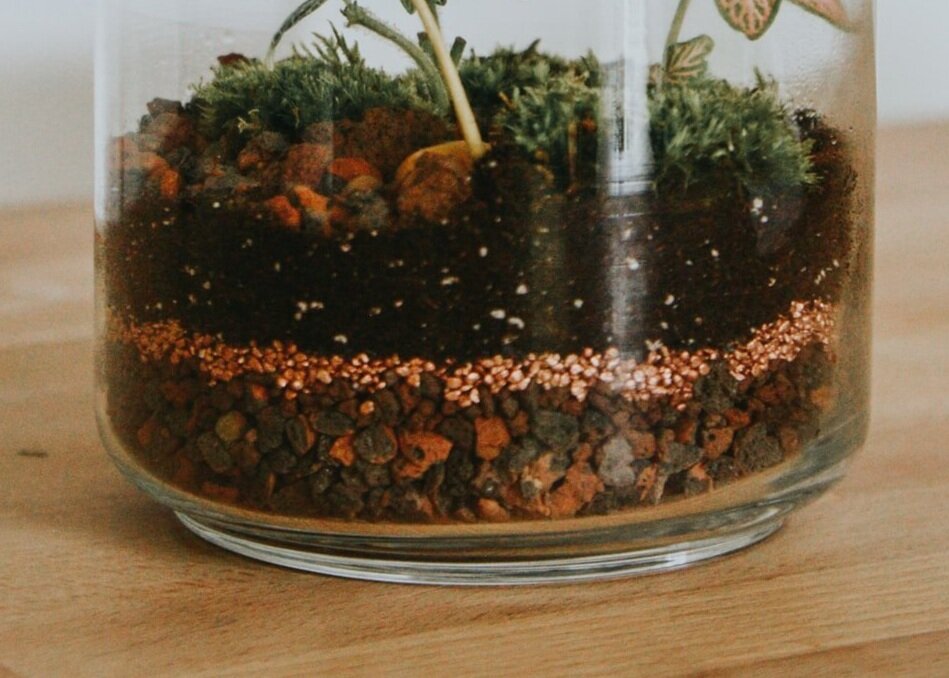
Layers of substrate for a terrarium, including a drainage layer.
When creating a terrarium, each layer of substrate must have a sufficient amount. The bottom layer should always be a drainage layer, and should be a minimum of 2 or 3 inches thick. This layer is a buffer zone (water table) for water to sit in, and keeps the planting medium from becoming a swampy mess. Next should be a barrier layer to prevent additional layers from washing into the drainage layer. This should be kept level and consistently one depth. Charcoal can be added on top of the barrier layer for added benefits and filtration, though it is not necessary. If included, the charcoal layer should also be kept level and one consistent thickness.
The top most layer should be the planting medium. If a culture of isopods and springtails are to be added, it is sometimes easier to mix the culture into the planting medium before adding it to the enclosure. The planting medium can be used to create various depths and elevations to make a more natural uneven looking landscape. Use this layer to fill in the pockets that were created for plants. If necessary, mist the substrate appropriately. If the cultures of macro or micro fauna have not been added, now is the time to do so. For aquarium hobbyists, once the substrate has been added, it is time to add the water. Treat the water as necessary, and begin running the filter to cycle the tank. This is also the appropriate time to add any cultures to the aquarium. When an aquariums levels have all leveled out to the appropriate range, the tank is considered to be fully cycled. This often takes anywhere from a week to a month depending on the cultures added to the tank, and how well they took. Flora can be added during this process, and can help the process along. This process is what makes the water safe and stable for aquatic animals.
Step 4: Purchase and Plant the Flora
Once the hardscaping and substrate are in place, it’s time to purchase flora. Almost every plant imaginable can be found online for sale, but don’t forget to visit local nurseries, pet shops, and garden centers.

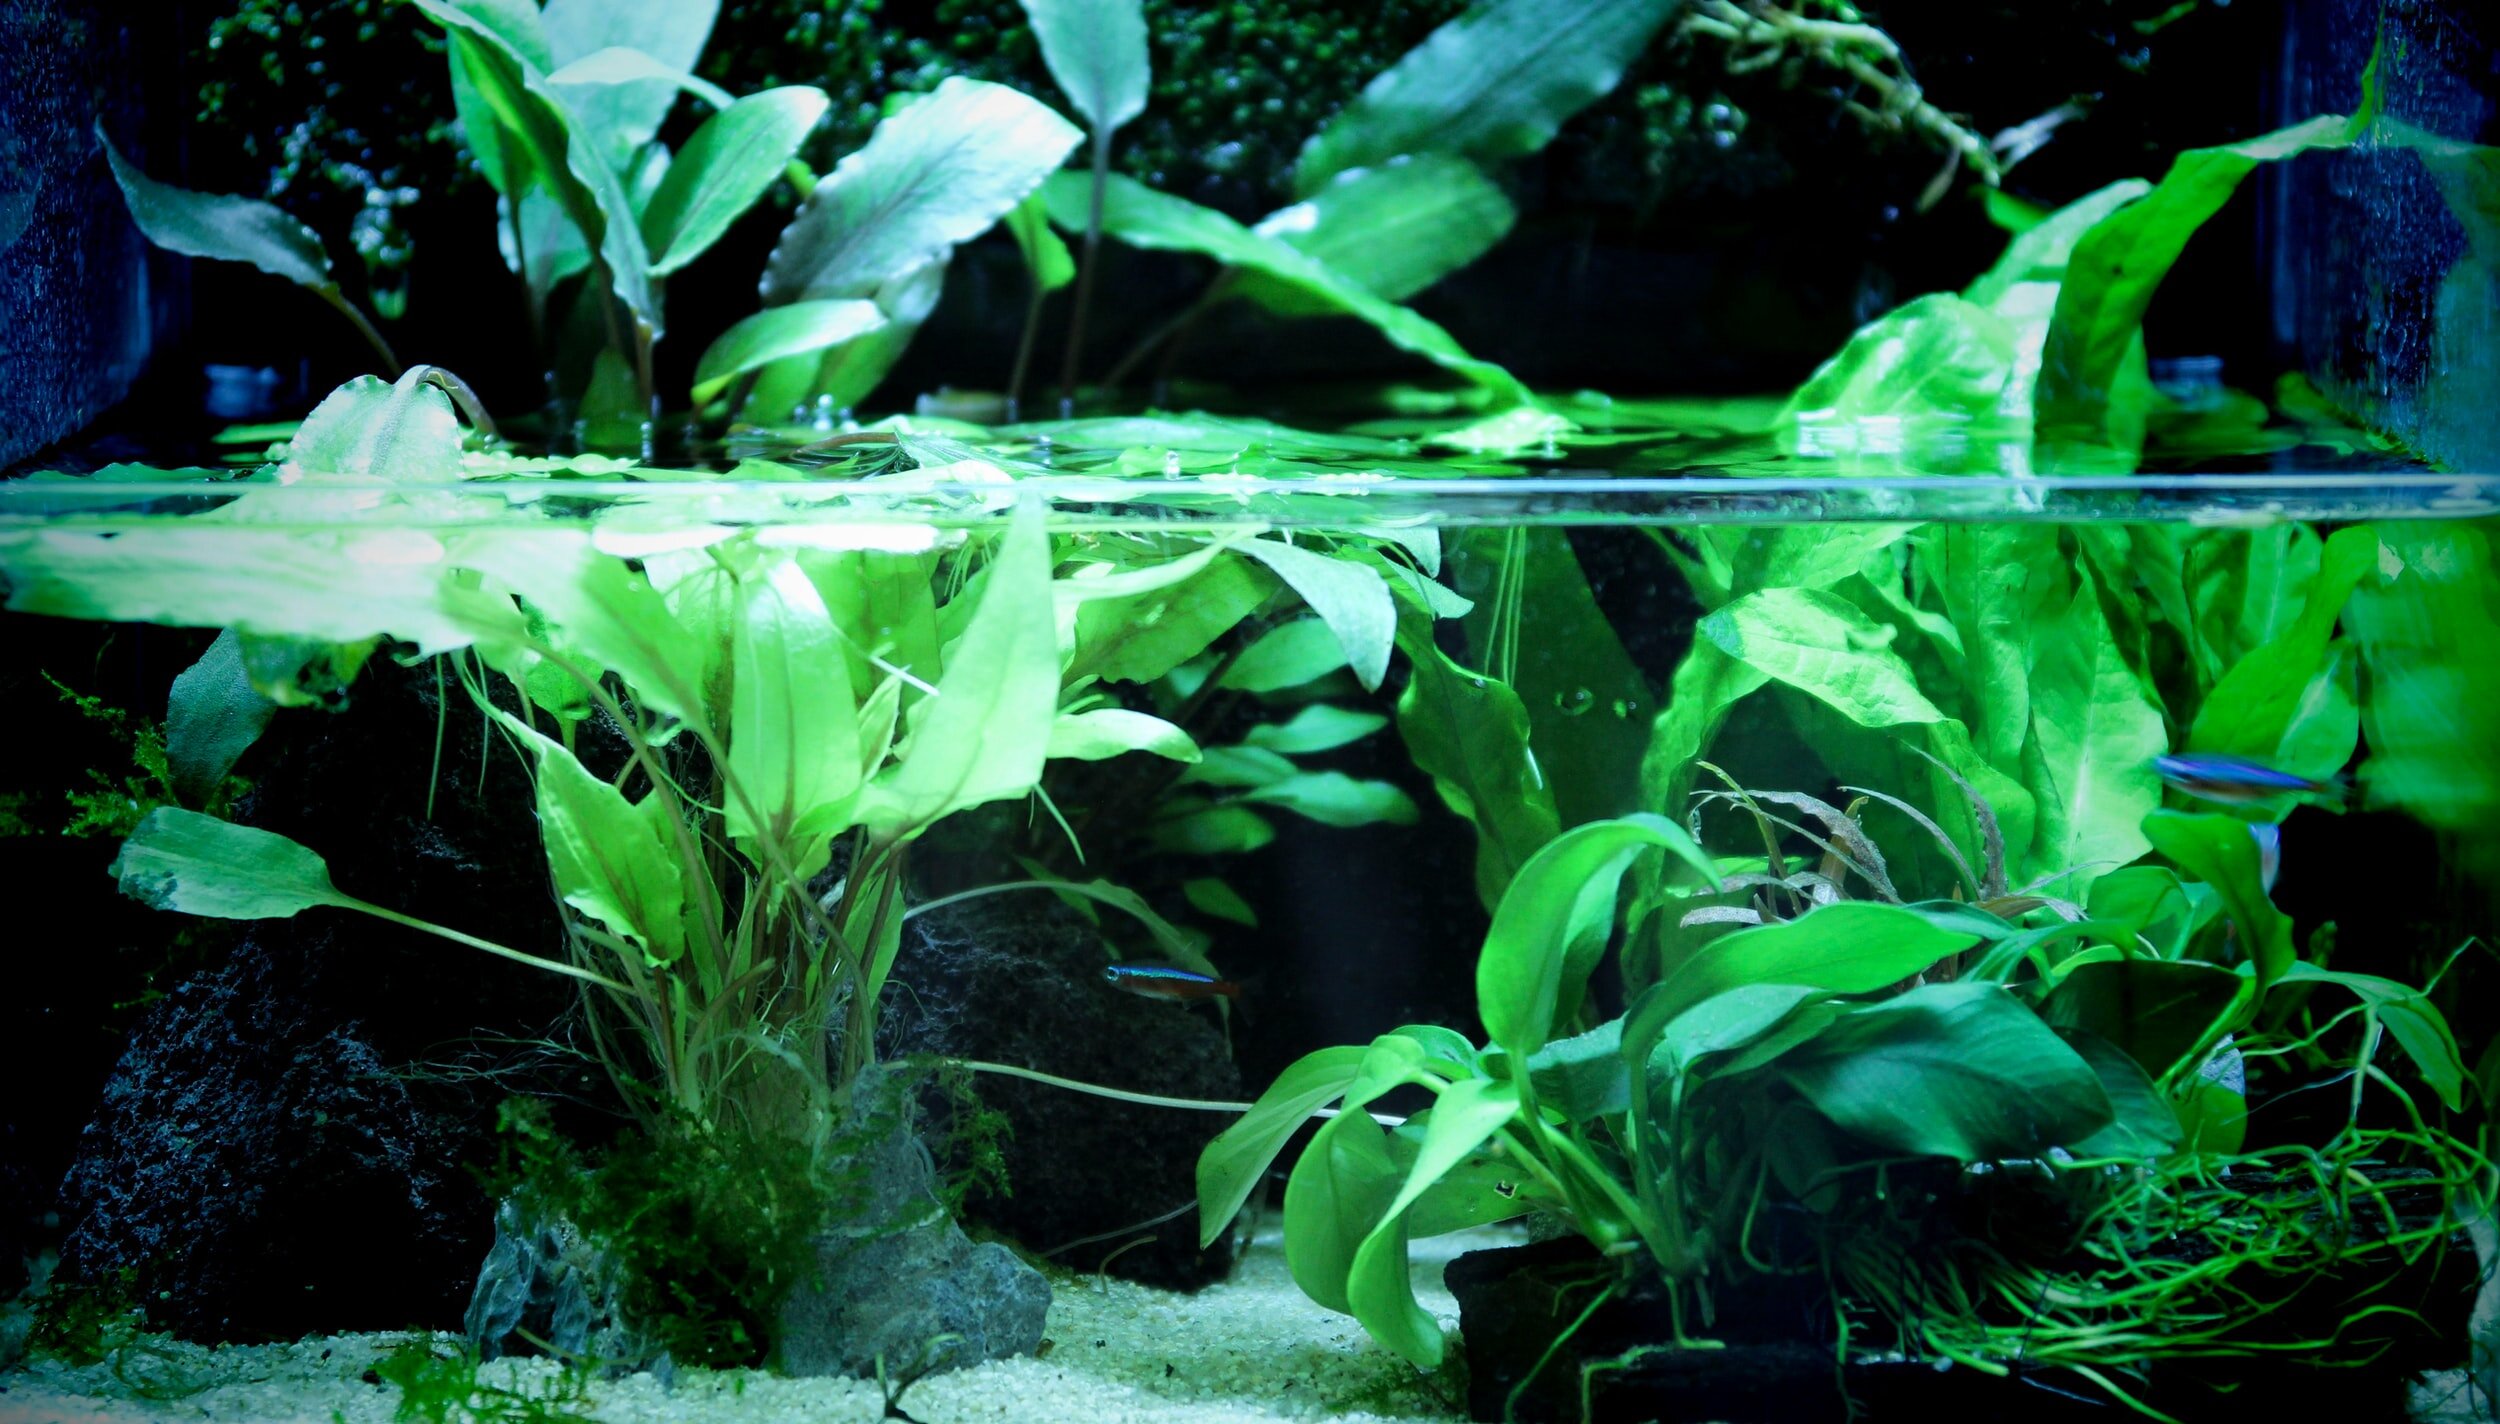
A planted aquarium; notice plants have been placed based on their growing habits and unique characteristics.
Once a variety of plants have been purchased, it’s time to add them to the vivarium. Keep in mind the lighting needs for individual plants, and their characteristics when choosing where to plant them. Vines are best planted against large structures so they spread up them, or spill down them. Ground covers are often planted toward the front of enclosures so that the view into the back of the tank is not obstructed. Give the plants some time to acclimate, and observe how they do over the next week or so. Some may die, some may start to look bad but then perk up, and some may flourish. Take note and move some around if necessary. Purchase more plants with similar growing requirements to those that are successful in the tank.
In aquariums, it may be necessary to give plants an acclimation period to adjust to the water chemistry. When choosing which plants to purchase, remember that they will be growing and spreading. It’s always the most interesting to start with small plants, or even bulbs and watch them naturally grow into the space in the vivarium. After the plants have been added, additional organic plant material can be added on top of the bare spots of the planting medium to give a more natural appearance, and to give hiding spots for microfauna. Leaf litter, wood chunks, and broken branches are all great options.
Step 5: Purchase and Add the Fauna


Fauna can be purchased once the vivarium has appropriately acclimated and all the supplies needed to support them have been obtained. Call local pet shops to see if the chosen animals are available. If not, oftentimes they will order them from one of their providers upon request. If local shops don’t carry the desired fauna, it is possible to purchase some species online. Mail ordering can sometimes be risky, and shipping can be costly, but it is a good option when the choices locally are minimal.
Once fauna has been obtained, they may need to be acclimated to the conditions of the vivarium. Aquatic species often require drip acclimation (for temperature and water conditions), or float acclimation (floating bags to match the temperature) before adding them. Research the best acclimation process for the species that will be added, and follow the instructions closely. Oftentimes the seller will provide specific instructions for this process. Once acclimated properly, add the fauna to the vivarium. This is by far the most exciting part of a vivarium build. Even if the inhabitants are properly acclimated, they may take some time to get used to their new home. Don’t be disappointed if they tend to hide, or aren’t very active. As they get more comfortable in their enclosure, they will begin to explore more.
Step 6: Observe, Enjoy, and Upkeep
After completing your vivarium it is finally time to enjoy it. One of the best things about a vivarium is that it will constantly change. Some plants will die off while others double in size. Vines will crawl up branches, spreaders will cover substrate, and inhabitants will interact with these changes. One of the best things to do is take a picture of your vivarium each week so the changes can be compared over time. Not only is it entertaining, but a lot can be learned from the process.


A successful vivarium can be mostly self-sustaining, especially if things like lighting and moisture control have been automated, and a complete and successful ecosystem has been created. Some upkeep will be required, such as changing out light bulbs or filters, trimming back plants that are overgrowing, feeding inhabitants, and maybe even adding or changing out a plant or two as things get too big, or die back. Additional hardscape features may even be added as time goes on. Issues may arise and may require the addition of new features. If plants seem to be turning yellow, added airflow may help. If the temperature in an aquatic setup is falling down into a dangerously cool zone for inhabitants during season changes, the addition of a heater (or additional heaters) may be necessary. Some work will be required to keep up with the ever changing vivarium, but for the most part, it’s there to observe and enjoy.
Practice makes perfect, so keep on creating.